how to instal solar panels
 Let’s make this easy. If you need help installing solar panels on your van, check out the video right here. But if you need even more help and some extra details, scroll down a bit further for the step-by-step written version. Either way, by the end of it, your solar panels will be installed and you’ll have all the electricity you could need…if you’ve designed the electrical system correctly.
How to Install Renogy Solar Panels – Text Edition
For those of you that need a few more details with your solar panel install, here’s a 10 Step how-to that will follow along with the video.
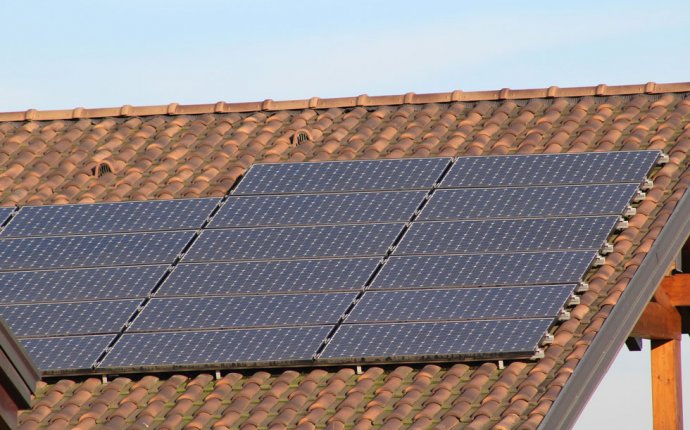
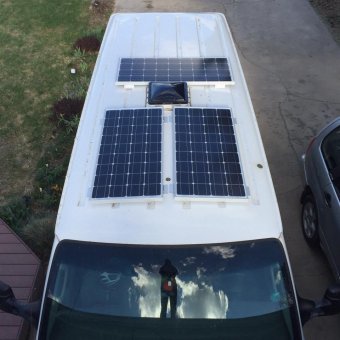
 1. Put the solar panels on top of your van where you’d like them to be installed
I had the general idea of where I wanted the solar panels to sit on top of my van, but without dry-fitting them first, I would have overlooked how the mounting holes actually lined up on the contoured roof. It’s also good to see how your flat panels will lay on a curved roof. I ended up needing some additional washers to make a solid mechanical connection with some of the outer mounting holes.
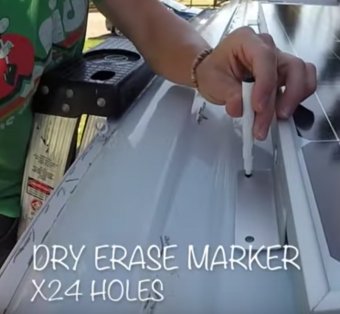
2. Mark the holes for drilling with a dry erase marker
Once you’ve got the panels laid out where they’re going to live permanently, use a dry erase marker to mark the mounting holes once you remove the panels. Make sure you double and triple check everything is where you want it. Once you start drilling holes in your ceiling, there’s no turning back….easily.
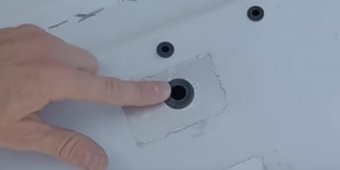
3. Hold your breath and start drilling 24 holes into your roof
 The Renogy installation manual calls for a 3/8″ well nut (expansion nut) to be used for mounting the panels, which can be purchased directly from the Home Depot. That also means you’ll use a 3/8″ drill bit, but again, YOU’RE DRILLING HOLES IN YOUR ROOF!! Make sure the drill bit really is the right size for the expansion (well) nut. i.e. You didn’t accidentally grab the 1/2″ bit instead of 3/8″.
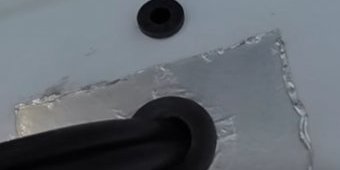
4. Drill a hole and add a grommet for the extension cables
The standard MC4 cables that come permanently mounted to the panels aren’t long enough to go directly to the charge controller, no matter if you’re hooking them up in series or parallel. Because of this, you also need to purchase extension cables, and this is how the electricity is going to travel to the controller.
The best, physical way of accomplishing this is drilling another hole or two in the roof for them to pass into the living area or wherever your charge controller is located. The sheet metal of the roof is sharp and jagged after drilling so you’ll also want some rubber grommets to protect the cable. The inside diameter of the grommet should match outside diameter of the extension cables for weather proofing, and the outside diameter of the grommet can be of any size as long as you have a matching drill bit to drill the hole.
Once you’ve got all that figured out, drill the hole, file down any sharp edges, and pop the grommet into place.
5. Layout panels on the ground and verify electrical connections
This probably could and should be done before Step #1, but since I’m following along with the video, it ends up here.